


IntroductionRecapTaking It FurtherUnderstanding the OpenAPI GeneratorInstallationUtilizing npmEmploying DockerGenerating an OpenAPI ClientUsing Docker Compose to Generate a JavaScript ClientConclusionAbout AuthorsSai Manasa IvaturiSrinivas vaddi
Introduction
OpenAPI (OAS) serves as a standard for describing the structure and behavior of RESTful APIs, enabling us to document APIs in a machine-readable and human-friendly format. This approach facilitates interactions with APIs through various tools and services.
Recap
In previous articles, we introduced the fundamentals of OpenAPI, outlined the process of creating an OAS specification for the To-Do API, and demonstrated how to utilize client code generated from the OAS spec to interact with the To-Do API. If you haven't already, please review those articles by accessing the parent links or here.
Taking It Further
In this article, we delve deeper into the realm of OpenAPI, exploring the generation of a JavaScript client for a backend API using the OpenAPI Generator. This versatile and powerful tool can produce client libraries, server stubs, API documentation, and more from the OAS document.
Understanding the OpenAPI Generator
The OpenAPI Generator stands as an open-source project designed to facilitate resource creation from the OpenAPI Specification. It boasts support for over 50 programming languages and frameworks, including JavaScript, Java, Python, Ruby, C#, Go, Swift, and many others.
With the OpenAPI Generator, one can effortlessly create client libraries for interaction with any server that exposes an OAS document. Moreover, it can generate server stubs to implement API logic based on the OAS document. Additionally, it proves valuable in generating API documentation, aiding API consumers in understanding and utilizing the API.
This guide primarily focuses on generating a JavaScript client for the To-Do API. However, future articles will explore additional options and features offered by the OpenAPI Generator.
Installation
Utilizing npm
To commence your journey with the OpenAPI Generator, initiate installation through npm (Node Package Manager). Open your terminal and execute the subsequent command:
npm install @openapitools/openapi-generator-cli -g
This command ensures global installation of the OpenAPI Generator CLI, enabling its utilization from any directory. The
-g flag can be disregarded if a specific directory/project is your preference.Employing Docker
Alternatively, Docker containers provide another avenue for establishing the OpenAPI Generator. This guide also demonstrates how to generate a client using Docker. Ensure that Docker is installed on your machine. For comprehensive guidance on installation and initial steps with Docker, refer to this tutorial. Additionally, for the advanced aspects of this guide, the presence of
docker-compose on your machine is essential.Once Docker is installed, open your terminal and execute the ensuing command to pull the latest version of the OpenAPI Generator image from Docker Hub, a repository of Docker images:
docker pull openapitools/openapi-generator-cli
To verify the successful installation, use the following command:
docker run openapitools/openapi-generator-cli version
This command should display version information pertaining to the OpenAPI Generator CLI.
Generating an OpenAPI Client
The OpenAPI Generator is proficient in generating a JavaScript client from an OAS document, utilizing the following command:
openapi-generator-cli generate -i {OAS_SOURCE} -g javascript -o {OUTPUT_DIR} --additional-properties usePromises=true,emitModelMethods=true,projectName={PROJECT_NAME},projectVersion={PROJECT_VERSION}
The breakdown of this command is as follows:
i {OAS_SOURCE}: This designates the input source of the OAS document, which can manifest as a local file path, a URL, or standard input. For example,i todo-api.jsonreferences a local file,i <http://backend:7787/v3/api-docs> pertains to a URL, andi -corresponds to standard input.
g javascript: This specifies the generator to employ. In this context,javascriptbrings forth a JavaScript client. A comprehensive list of available generators is accessible here.
o {OUTPUT_DIR}: This denotes the output directory where the generated files are archived. The selection of a valid directory path remains at your discretion. For instance,o /local/frontend/todoclientpreserves the files locally.
-additional-properties: This accommodates the specification of supplementary properties, affording customization of the generation process. You can employ multiple properties, demarcating them with commas. For instance,-additional-properties usePromises=true,emitModelMethods=true,projectName=todoclient,projectVersion=0.5.1activates promises, emits model methods, assigns a project name, and designates a project version.
Upon execution of the command, a success message will emerge: "Successfully generated code to {OUTPUT_DIR}." The output directory will encompass several files, including
README.md, package.json, index.js, and a src directory housing the client code. For reference, you should see something like the below screenshot.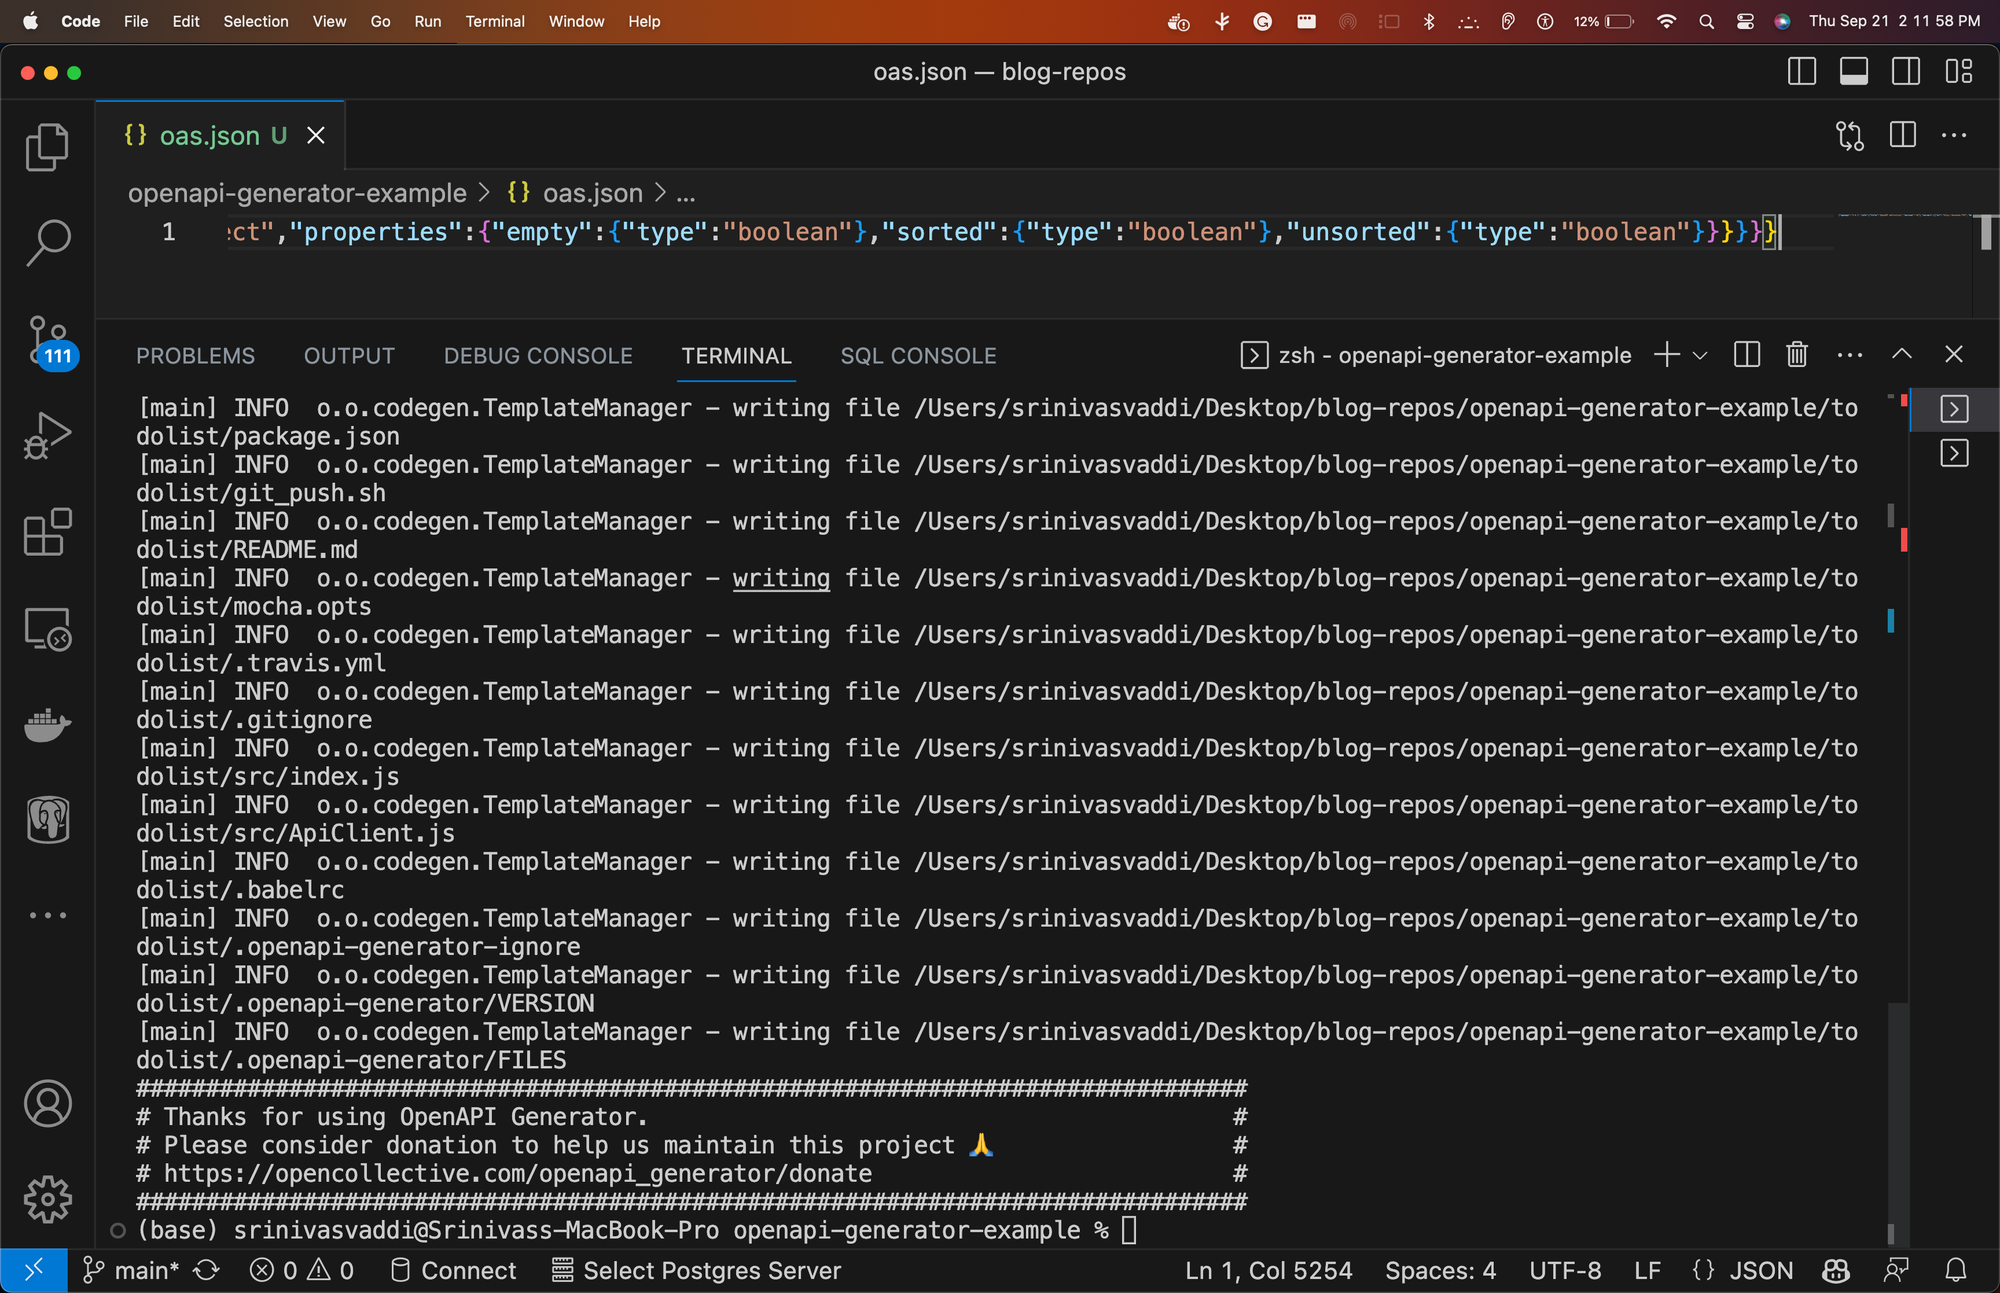
The same command can be employed with varying input formats (JSON or YAML), contingent on the source of API documentation. Here are illustrative examples:
# Utilizing a local JSON file
openapi-generator-cli generate -i oas.json -g javascript -o /local/frontend/todoclient --additional-properties usePromises=true,emitModelMethods=true,projectName=todoclient,projectVersion=0.5.1

# Leveraging a local YAML file
openapi-generator-cli generate -i oas.yml -g javascript -o /local/frontend/todoclient --additional-properties usePromises=true,emitModelMethods=true,projectName=todoclient,projectVersion=0.5.1
Additionally, the same results can be attained using Docker through the following commands:
docker run -v $(PWD):/local openapitools/openapi-generator-cli generate -i {OAS_SOURCE} -g javascript -o {OUTPUT_DIR}/{PROJECT_NAME} --additional-properties usePromises=true,emitModelMethods=true,projectName={PROJECT_NAME},projectVersion={PROJECT_VERSION}
However, when implementing Docker, it is essential to comprehend the mechanics of volumes to ensure accessibility of the generated client code.
Using Docker Compose to Generate a JavaScript Client
If we want to automate the process of generating a JavaScript client from the OAS document, we can use Docker Compose to create a service that runs the OpenAPI Generator as a container. Docker Compose is a tool that allows us to define and run multiple containers using a YAML file.
To use Docker Compose, we need to have a
docker-compose.yml file that specifies the configuration of our services. In this guide, we’ll create a simple docker-compose.yml file that contains two services: curler and generator.Assumptions made in the below docker-compose.yml file are that -
- docker-compose is installed on your machine
- the API is reachable on the “backend” docker-network
- if you already have the the
OASdocument fell free to remove thecurlerand customize thegenerate .....command.
The
curler service is responsible for fetching the OAS document from the backend server and saving it as a local file. The generator service is responsible for running the OpenAPI Generator and creating the JavaScript client from the OAS document.Recommendation : to tryout the OpenAPI generator, we recommend that you try using only the
generator part of the below docker-compose.yml file so that it would be easy.Here is the
docker-compose.yml file that we’ll use:version: '3' services: curler: image: curlimages/curl depends_on: - backend networks: - app-network volumes: - "${PWD}:/local" command: sh -c 'curl http://backend:7787/v3/api-docs > /local/openapi.json' generator: image: openapitools/openapi-generator-cli networks: - app-network depends_on: - curler volumes: - "${PWD}:/local" command: generate -i /local/openapi.json -g javascript -o /local/frontend/todoclient --additional-properties usePromises=true,emitModelMethods=true,projectName=todoclient,projectVersion=0.5.1 networks: app-network: driver: bridge
Let’s break down the file and see what each part means:
version: '3': This specifies the version of the Docker Compose file format. We use version 3, which is the latest and most compatible version.
services: This is the section where we define our services. Each service has a name and a set of options that configure its behavior.
curler: This is the name of the first service. It uses thecurlimages/curlimage, which is a lightweight image that contains thecurlcommand. We use the following options for this service:depends_on: This specifies the dependencies of this service. We use this to ensure that thecurlerservice waits for thebackendservice to be ready before running. Thebackendservice is the service that exposes the OAS document at thehttp://backend:7787/v3/api-docsURL. We assume that this service is already defined and running in anotherdocker-compose.ymlfile. However, you can always change it as per your backend docker-container and its network.networks: This specifies the networks that this service belongs to. We use this to connect thecurlerservice to the same network as thebackendservice, so that they can communicate with each other. We use theapp-networknetwork, which is a custom network that we define later in the file.volumes: This specifies the volumes that this service mounts. We use this to share files between the host machine and the container. We use the${PWD}variable to refer to the current working directory on the host machine, and mount it as the/localdirectory in the container. This way, we can access the files in the current working directory from the container, and vice versa.command: This specifies the command that this service runs when it starts. We use this to execute thecurlcommand that fetches the OAS document from thehttp://backend:7787/v3/api-docsURL and saves it as the/local/openapi.jsonfile in the container. This file will also be available as theopenapi.jsonfile in the current working directory on the host machine, thanks to the volume mapping.
generator: This is the name of the second service. It uses theopenapitools/openapi-generator-cliimage, which is the official image of the OpenAPI Generator CLI. We use the following options for this service:networks: This specifies the networks that this service belongs to. We use this to connect thegeneratorservice to the same network as thecurlerservice, so that they can communicate with each other. We use the sameapp-networknetwork as before.depends_on: This specifies the dependencies of this service. We use this to ensure that thegeneratorservice waits for thecurlerservice to finish before running. This way, we can guarantee that the OAS document is available before generating the JavaScript client.volumes: This specifies the volumes that this service mounts. We use the same volume mapping as before, to share files between the host machine and the container.command: This specifies the command that this service runs when it starts. We use this to execute thegeneratecommand of the OpenAPI Generator CLI, using the same parameters as before. The only difference is that we use the/local/openapi.jsonfile as the input source, instead of a URL. This file is the same file that thecurlerservice created and saved in the container. The output directory is also set to/local/frontend/todoclient, which will be available as thefrontend/todoclientdirectory in the current working directory on the host machine, thanks to the volume mapping.
networks: This is the section where we define our custom networks. We only have one network, which is theapp-networknetwork. We use the following options for this network:driver: This specifies the driver to use for this network. We use thebridgedriver, which is the default and most common driver. It creates a private network that connects the containers to each other and to the host machine.
After creating the
docker-compose.yml file, we can run the following command to start the services:docker-compose up
And then we should see the generated client in the location as specified! Thats it! thats how easy it is!
Conclusion
In this article, we've explored how to create an OpenAPI client using the OpenAPI Generator. Whether you prefer npm or Docker, you now have the tools and knowledge to generate client code for your API specifications efficiently. With the generated client, you can easily interact with your API and leverage the benefits of OpenAPI to streamline your development process.
With that said you can explore more about OpenAPI Generators here at this repository and reach out to us if you have more questions. Try to get hands-on with other OpenAPI Generators and let us know about your learnings.
Stay tuned for more series!
About Authors
Sai Manasa Ivaturi


I'm a Software Development Engineer based in Atlanta, Georgia with 5+ years of experience in the software industry. My focus area has been Backend development and full-stack development.
View my Resume here.

Masters Degree in Computer Science Indiana University, Bloomington
Jan 22 - May 23

Bachelors Degree in Computer Science Pragati Engineering College, India
Aug 14 - April 18

Srinivas vaddi


Hi! I’m a recent master’s graduate from Indiana University Bloomington (IUB) 🎓 and a Software Development Engineer with 4+ years of experience. Looking for #jobs!
My areas of expertise are Software Development, DevOps, Testing, Integration, Data Engineering and Data Analytics. Mostly worked on Python, Django/Flask, Apache Airflow, Apache Spark, AWS, and DevOps. I have a versatile background & a ‘can do’ attitude 🤓.
I like blogging and sharing knowledge. I’ve built a server at home from scratch! I used it to learn various technologies and to contribute to the open-source. I love tech, philosophy, literature, and history. My favorite books 📚 of all time are ‘The Alchemist’ and ‘Chanakya Neeti’ 🙌.

Masters Degree in Computer Science Indiana University, Bloomington Aug 23, 2021 → Dec 17, 2022
Bachelors Degree in Computer Science Gitam University (Deemed to be) Jun 1, 2014 → Apr 1, 2018