


Getting started with Operations in MongoDBCreating a MongoDB database and MongoDB database collectionSteps:Importing data into MongoDB Collection using MongoDB CompassSteps to import data to MongoDB :Using “Mongosh”Basic CRUD operations on MongoDB📝 Insert a single document into the collection/database📚 Insert multiple documents into the collection/database🔄 Update a document in the database❌ Delete a document from the databaseAbout AuthorsSai Manasa IvaturiSrinivas vaddi
Getting started with Operations in MongoDB
Since Part 1 and Part 2 of this series discuss the general over of this tutorial series and the setup respectively, we are now at the place where we can try running queries on MongoDB.
The below operations can be performed from
mongosh or MongoDB CompassCreating a MongoDB database and MongoDB database collection
- Once connected to a MongoDB deployment using Compass, you can create and explore different databases and collections using the left sidebar panel in Compass.
- To get started with different operations on MongoDB, we must create a database and a collection first so that we can start inserting data on which we can perform the required operations.
- To create a new database or collection using Compass, you can click on the Create Database or Create Collection button at the top of the sidebar panel. You will need to provide a name for your database or collection, and optionally some settings such as collation, storage engine, capped size, etc.
Steps:
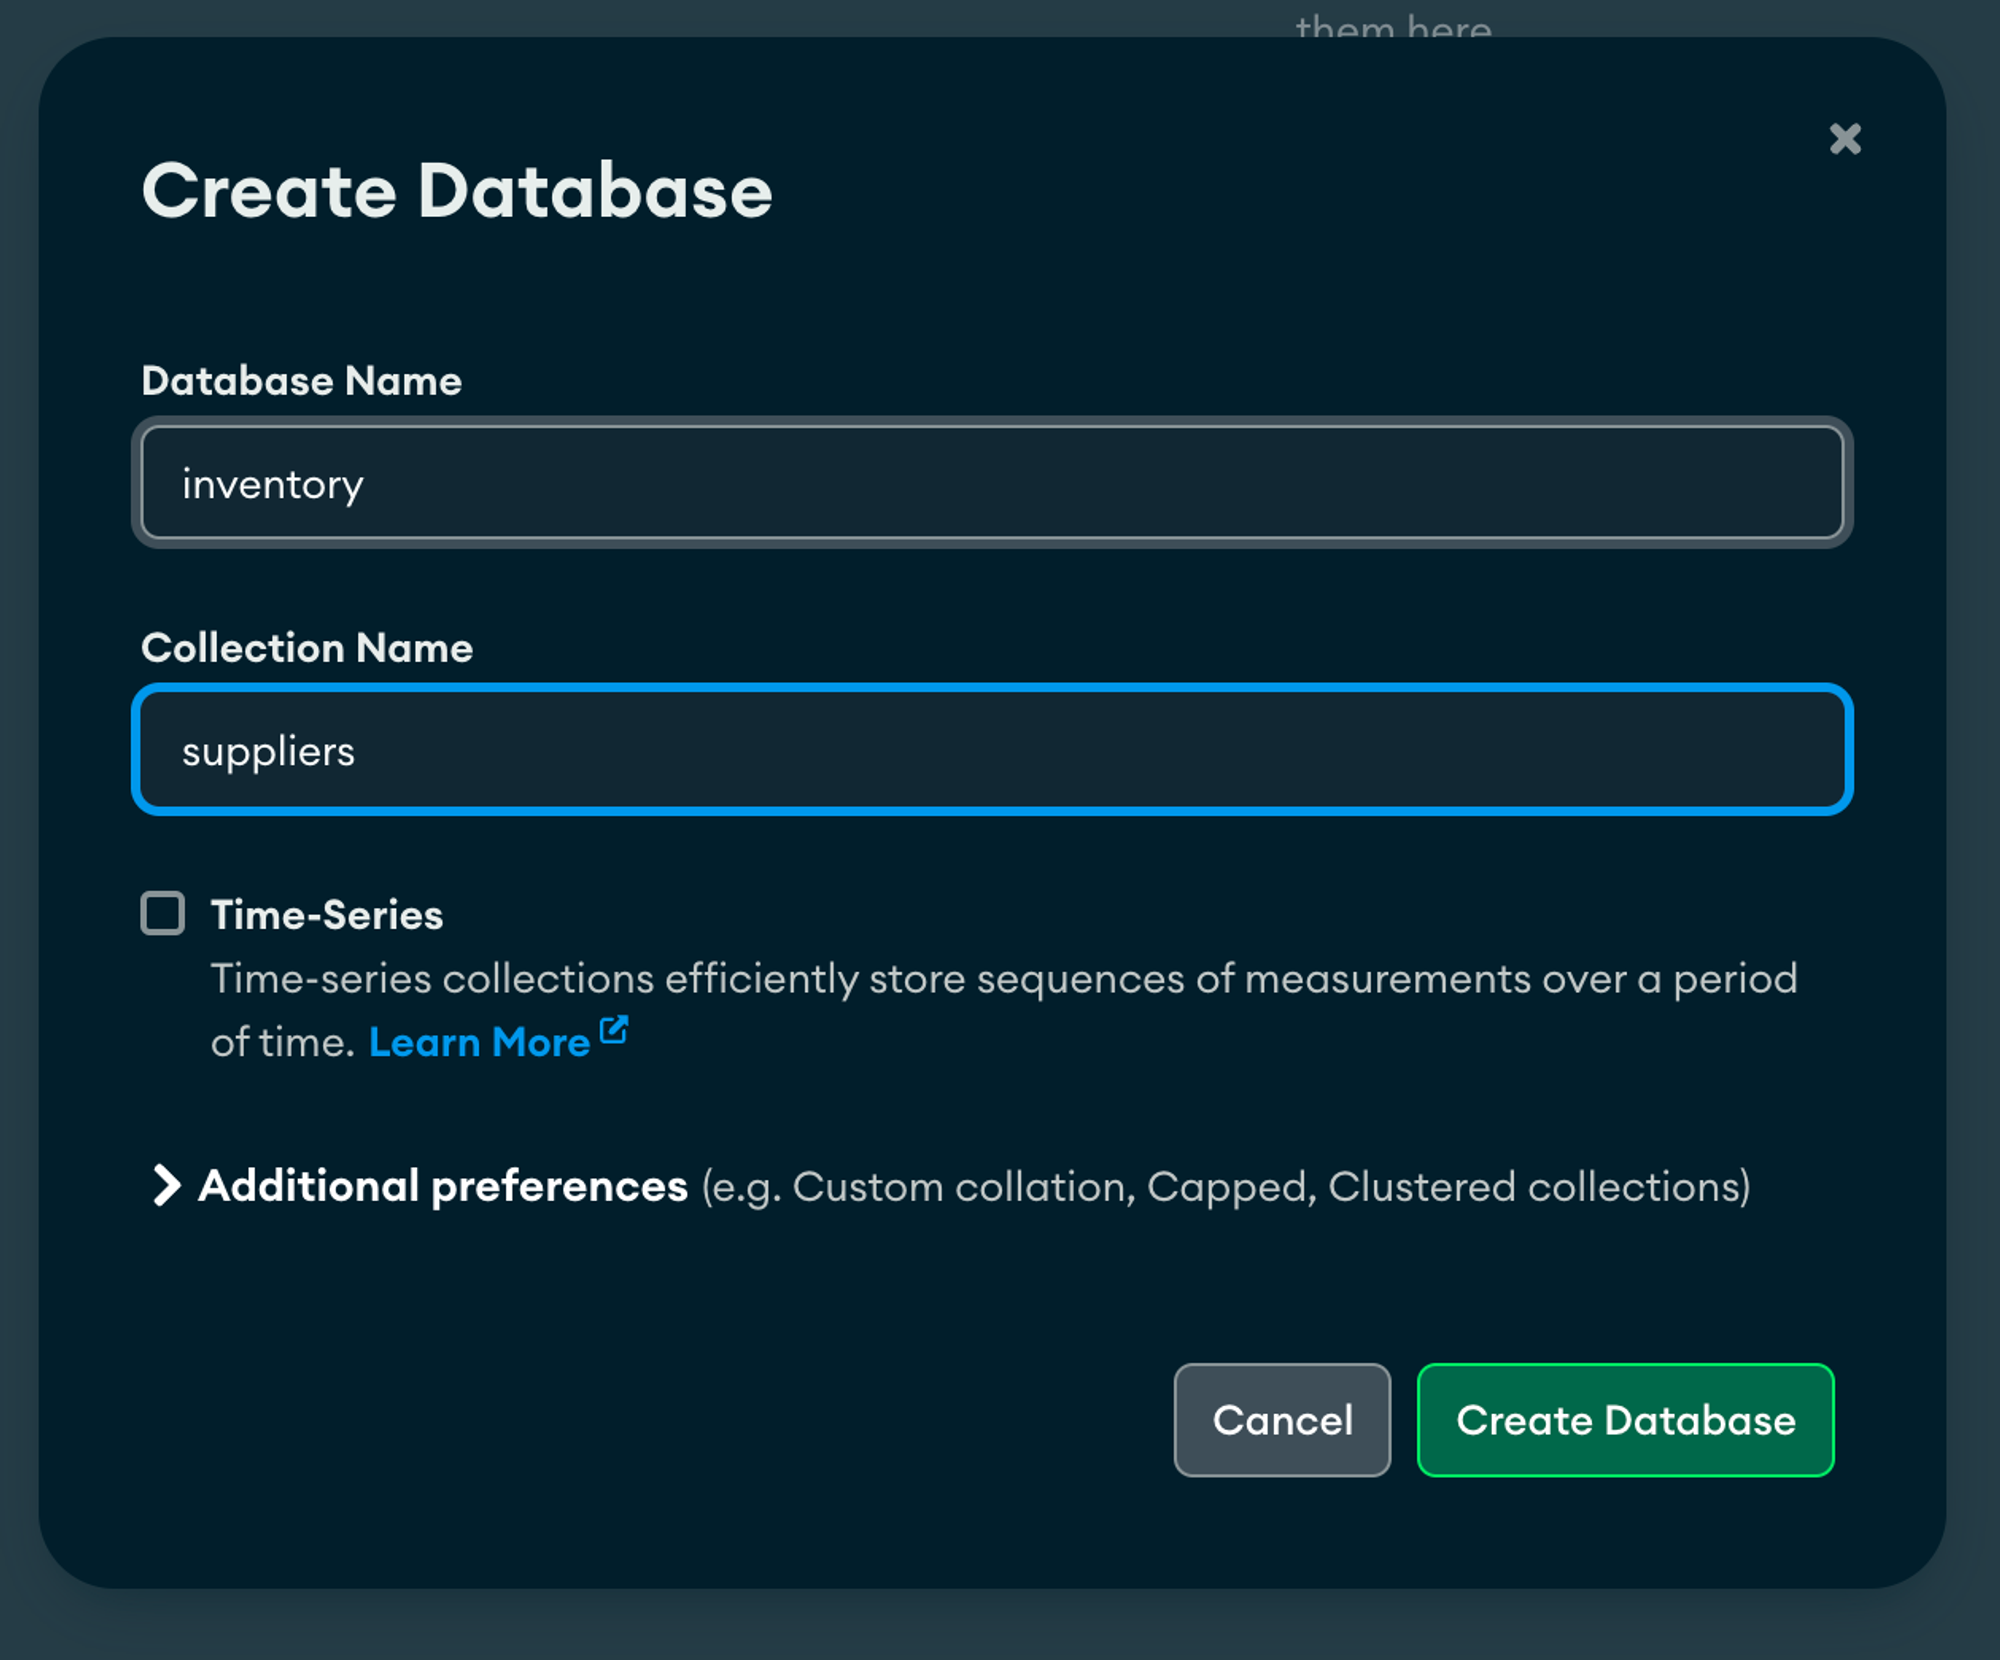
- Click on the Databases
➕icon on the left sidebar menu.
- A pop-up appears where we can enter the database and collection names along with a few other settings we can tweak. Once we hit the “Create Database” button, a new MongoDB database is created within which our collection exists.
- We can now proceed to add our data to this collection or create new collections by clicking on the ➕ icon present beside the Database we created earlier on the side menu.
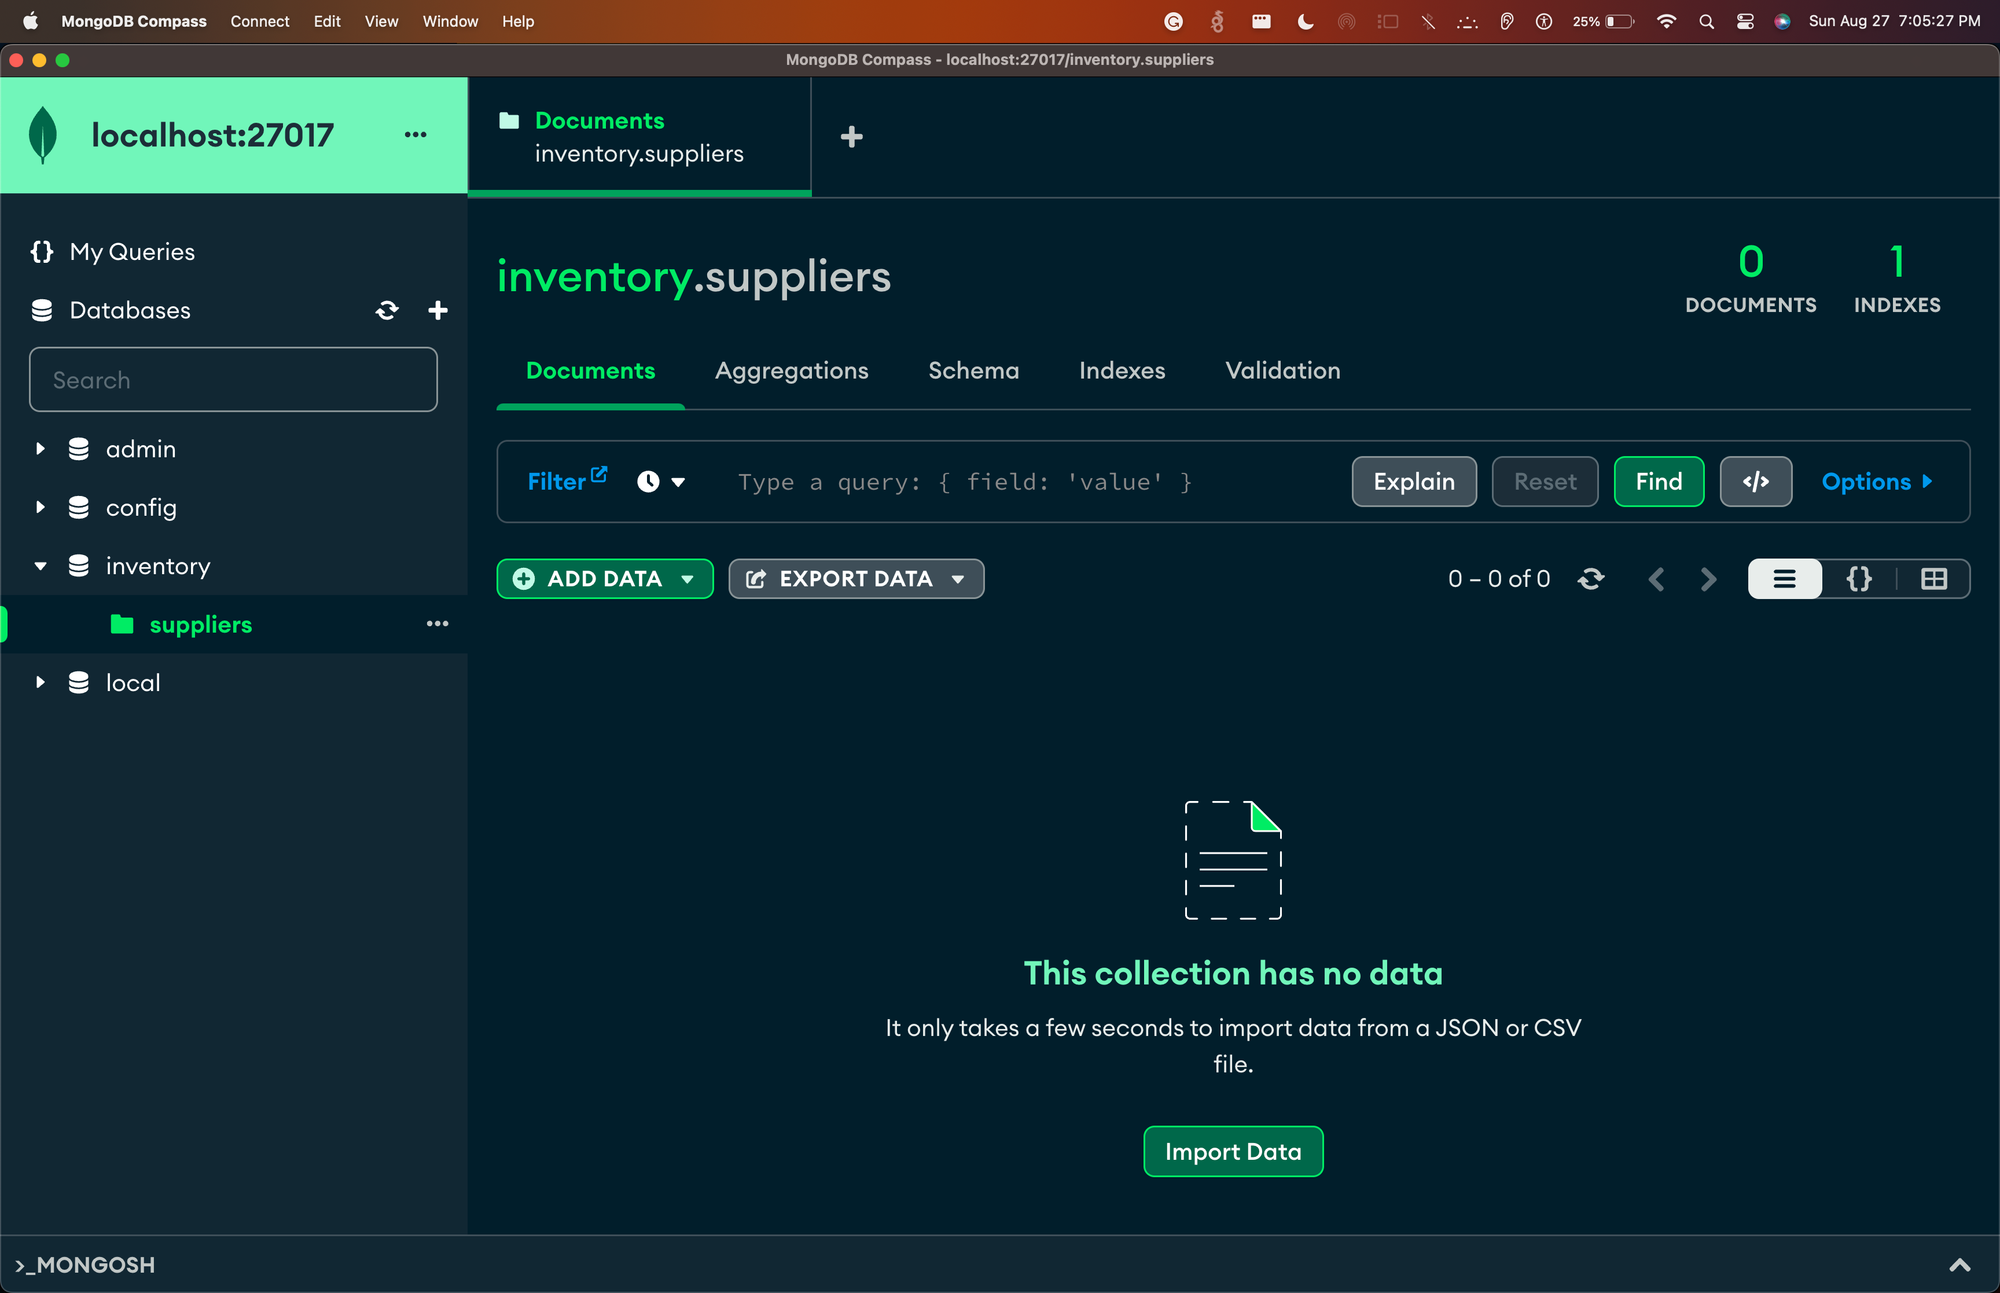
- To browse and modify the documents in a collection using Compass, you can click on the collection name in the sidebar panel and select the Documents tab at the top of the main panel. You will see a list of documents in your collection, and you can use the buttons at the top to add, edit, delete, duplicate, or export documents.
Importing data into MongoDB Collection using MongoDB Compass
To import data into a database without using a graphical user interface (GUI) we might need to install and customize some additional tools. Some of these are:
- MongoDB drivers that enable connecting to the database from an application or cli
- A tool like
mongoshor a script that can insert data into the database.
- Additionally, we might want to plan on -
- Managing dependencies
- Setting up different users and permissions
- Monitoring the import process
- Handling errors and exceptions
- Checking the logs for any issues
- Controlling parallelism and concurrency
These steps can be tedious and time-consuming, especially if there is a large amount of data to import. That is why MongoDB offers a free and reliable alternative: MongoDB Compass.
MongoDB Compass is a GUI tool that helps import data into your databases easily. It can also be used to explore, query, and manipulate your data. However, we must make sure that the data to be imported is in JSON or CSV format, as these are the supported file formats for importing databases into MongoDB by MongoDB Compass. Alternatively, we can also use MongoDB’s Compass to paste our documents directly from the clipboard. This can be helpful in cases when you have records being printed on the console somewhere and you cannot get them in a file.
MongoDB also offers a command-line utility called mongoimport - which can be handy for importing JSON or CSV documents into the MongoDB.
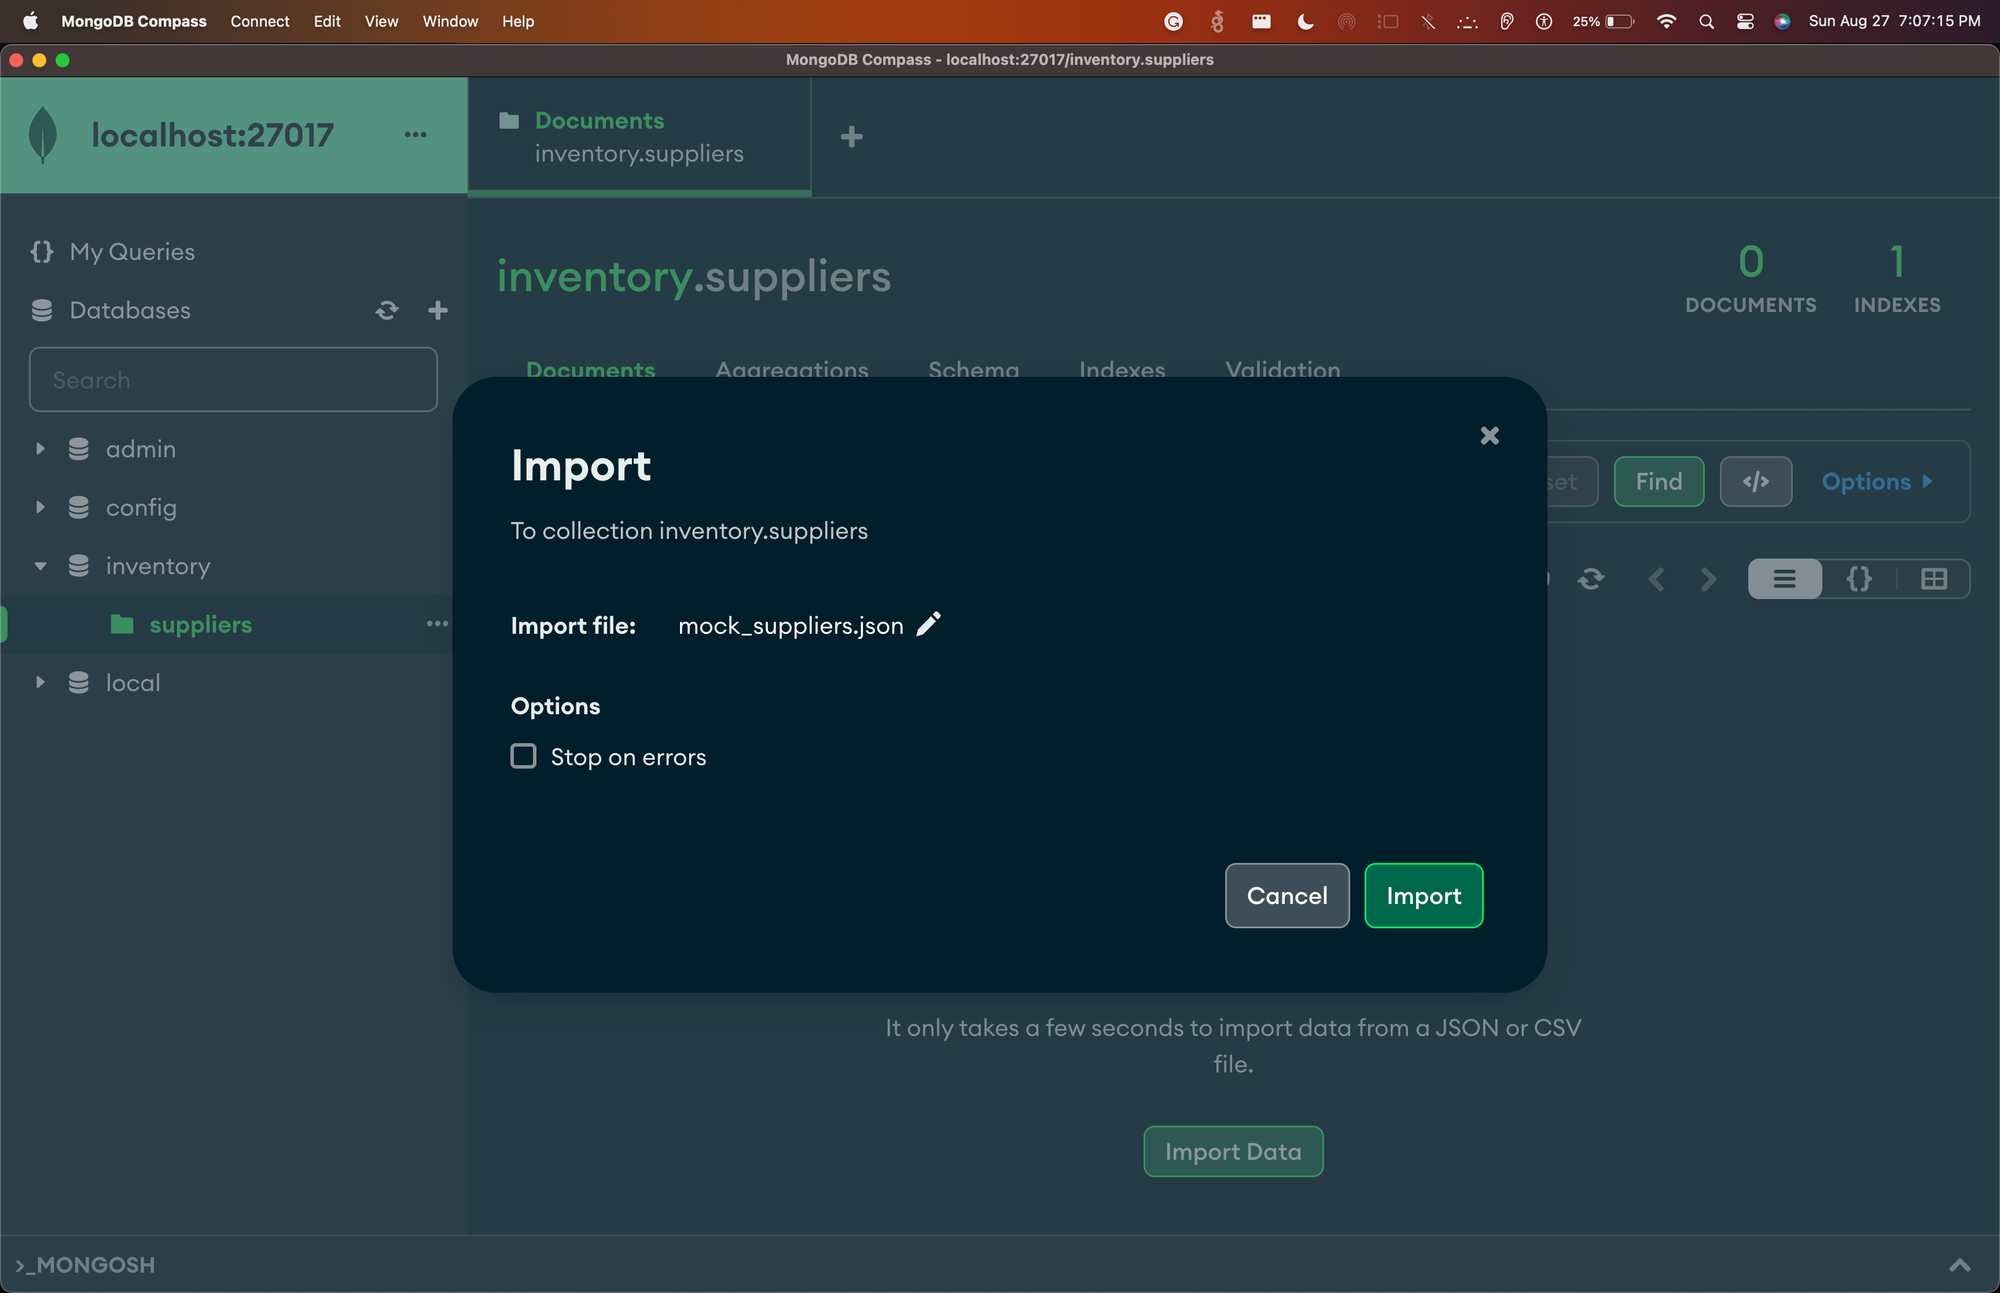
Steps to import data to MongoDB :
- Click on the ➕ ADD DATA button present on the main screen, below the ‘Filter’ input section.
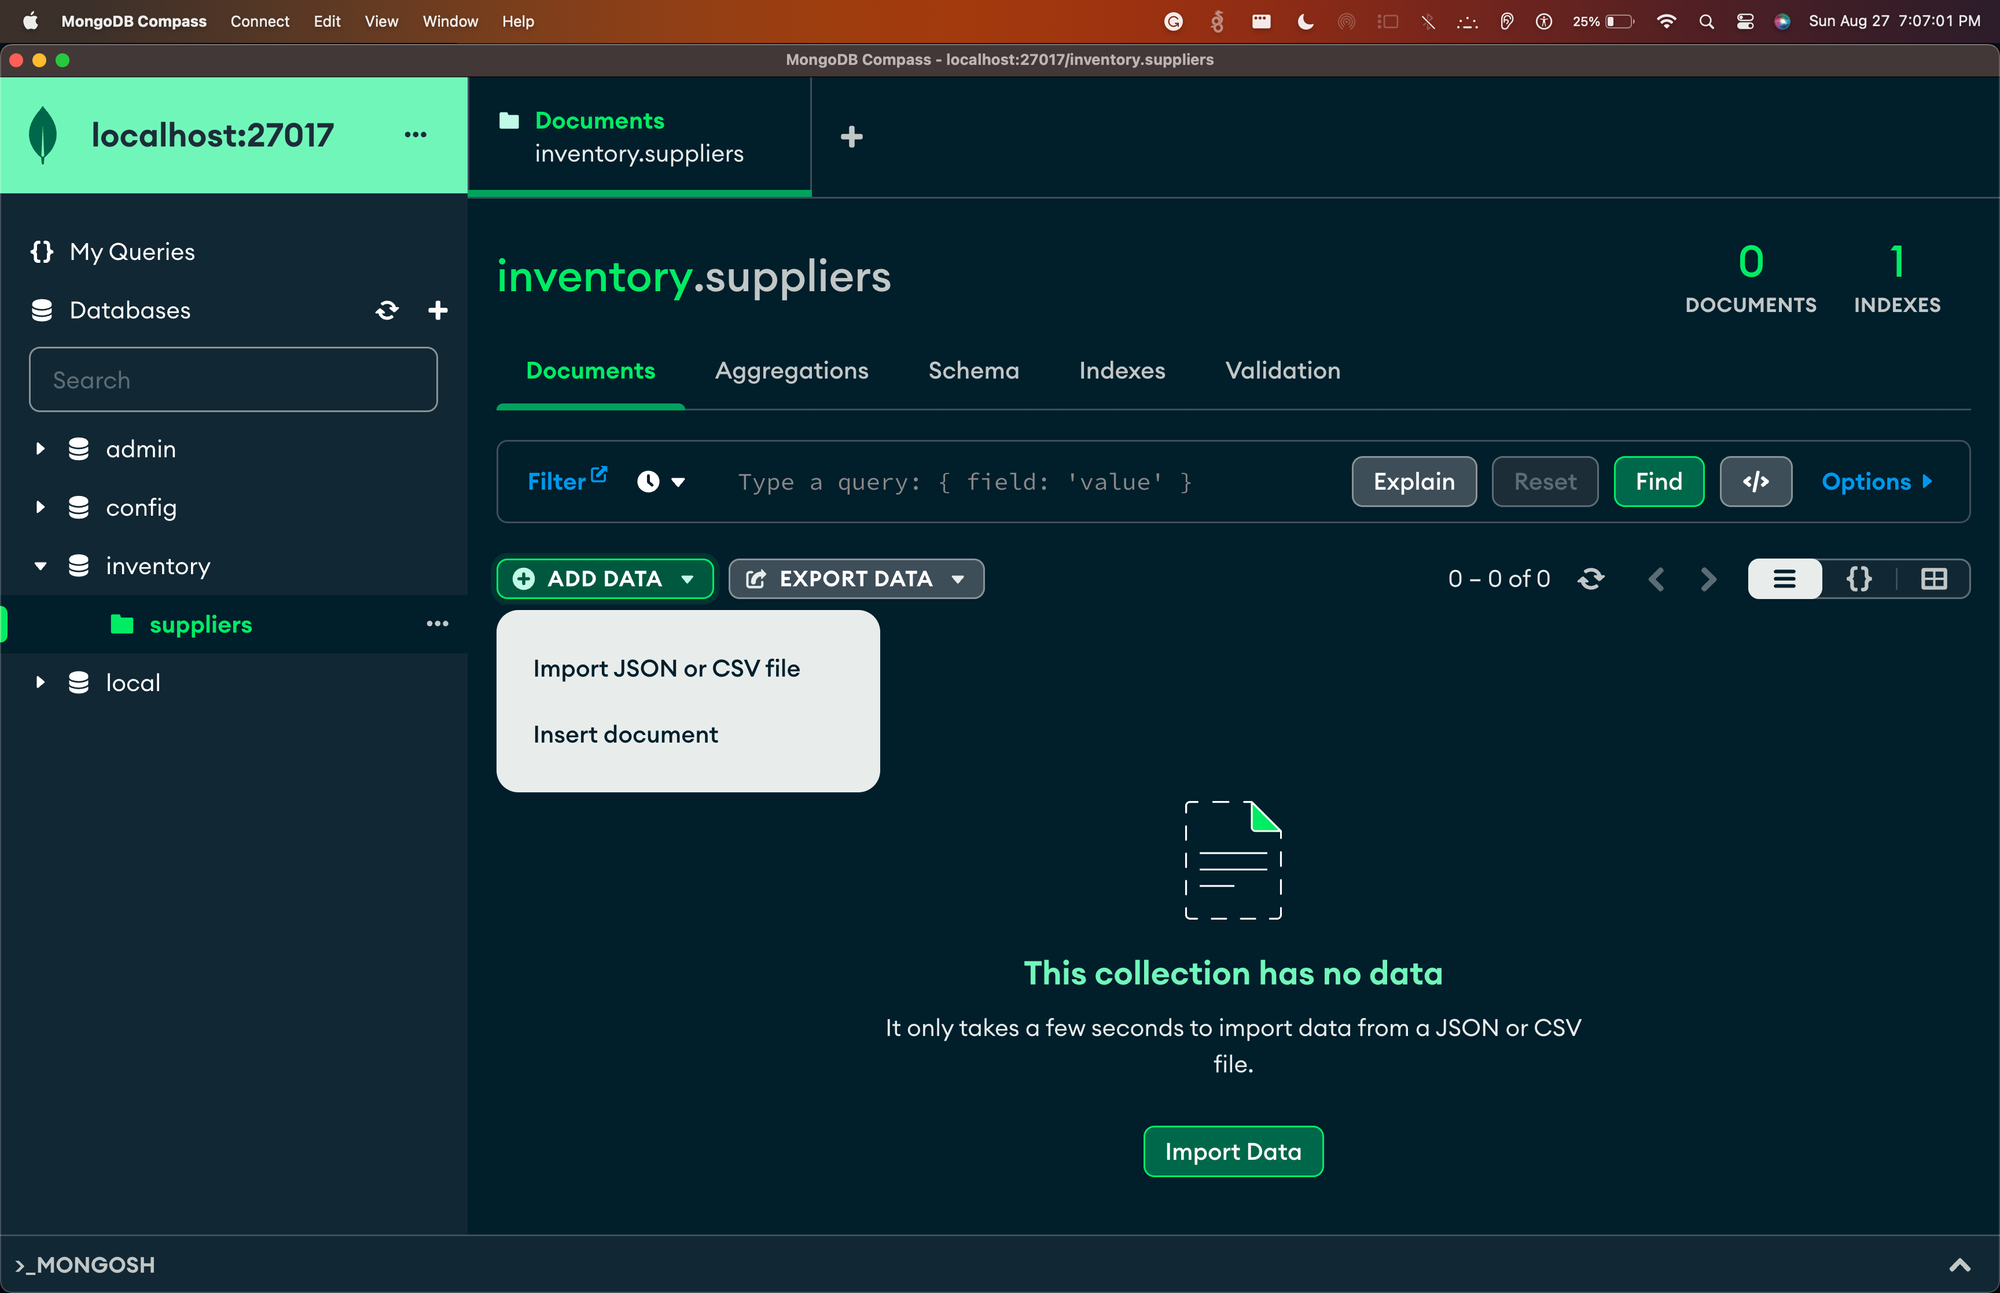
- Click on the JSON or CSV option in the drop-down menu
- Select the documents from the File Explorer/Finder
- Finally, confirm the data import by clicking on the Import button
- Finally a Notification ✅ appears on the bottom right corner indicating the number of records imported.
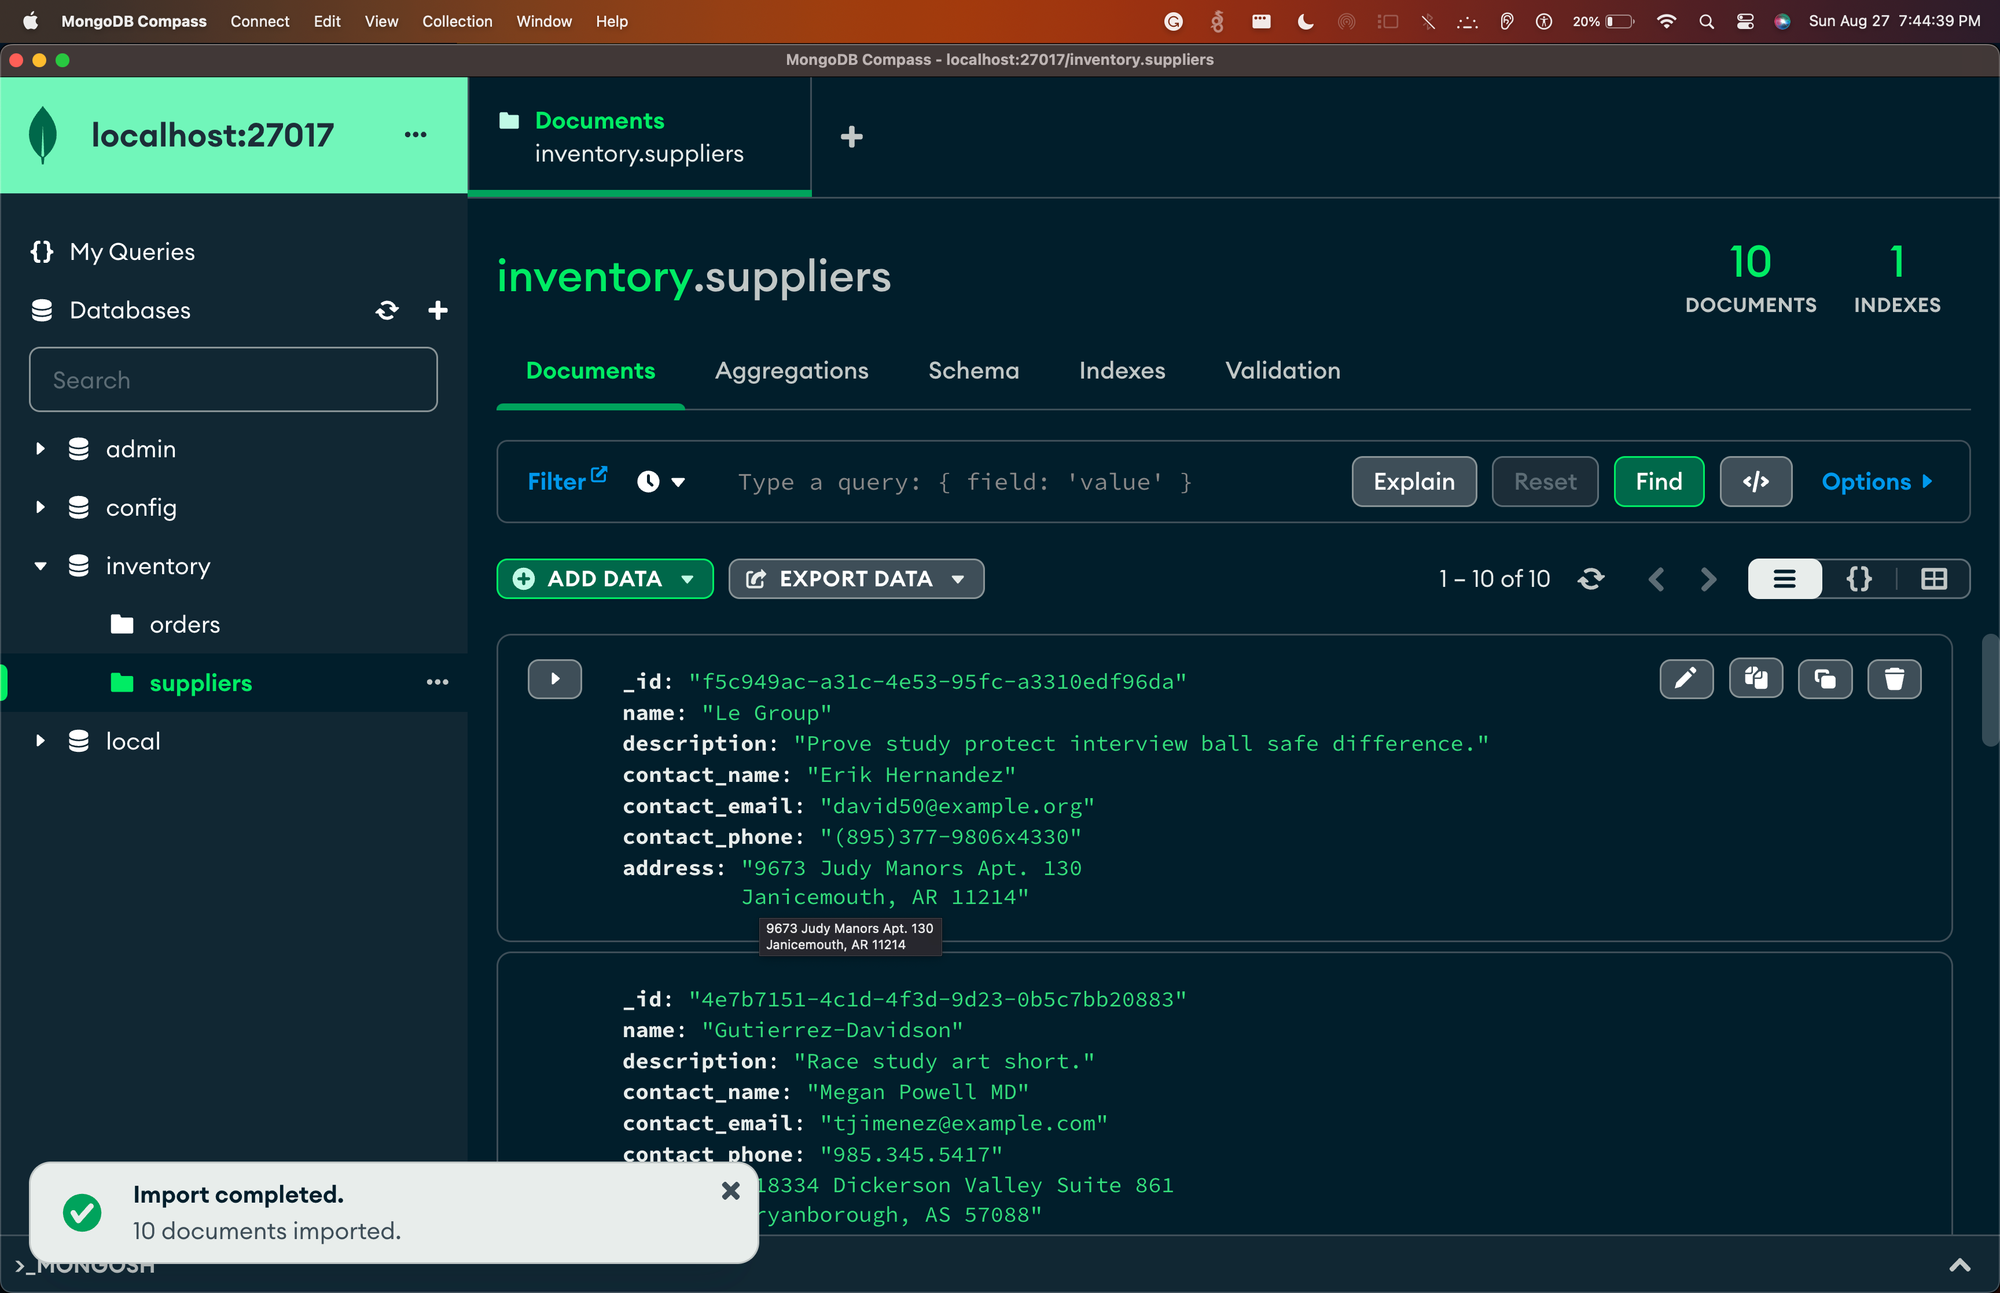
- This marks the completion of data import for this collection
- We can repeat the same for all of our collections.
Using “Mongosh”
Mongosh is a command-line utility provided by MongoDB that allows you to interact with MongoDB databases.
mongosh helps us perform various database operations, such as creating, reading, updating, and deleting documents, running aggregation pipelines, managing indexes, and a lot more.We do not need to install
mongosh separately as MongoDB compass already has mongosh bundled with it!However, if you want to install
mongosh on a machine without MongoDB Compass, it can be downloaded from the MongoDB Download Center and follow the installation instructions for the respective operating system. Once installed we can connect to the local MongoDB instance by using the below command -
mongosh mongodb://localhost:27017
This will connect you to a local MongoDB instance running on port 27017. For more details, visit Connect to a Deployment.
Mongosh is built on Nodejs and Javascript. That means, we can execute JavaScript expressions and statements, access global variables and methods, and use Node.js modules. We can use the db variable to access the current database and its collections, and use various MongoDB Shell Methods to perform database operations. // Switch to the test database use test // Insert a document into the users collection db.users.insertOne({name: "Alice", age: 25}) // Find all documents in the users collection db.users.find() // Update a document in the users collection db.users.updateOne({name: "Alice"}, {$set: {age: 26}}) // Delete a document from the users collection db.users.deleteOne({name: "Alice"})
To learn more about how to use mongosh, see the MongoDB Shell Documentation.
Basic CRUD operations on MongoDB
After importing the data, the next step is to perform various MongoDB operations on the
supplier collection. In this section, we will learn how to perform basic CRUD (create, read, update, and delete) operations on the supplier collection that we imported in the previous sections.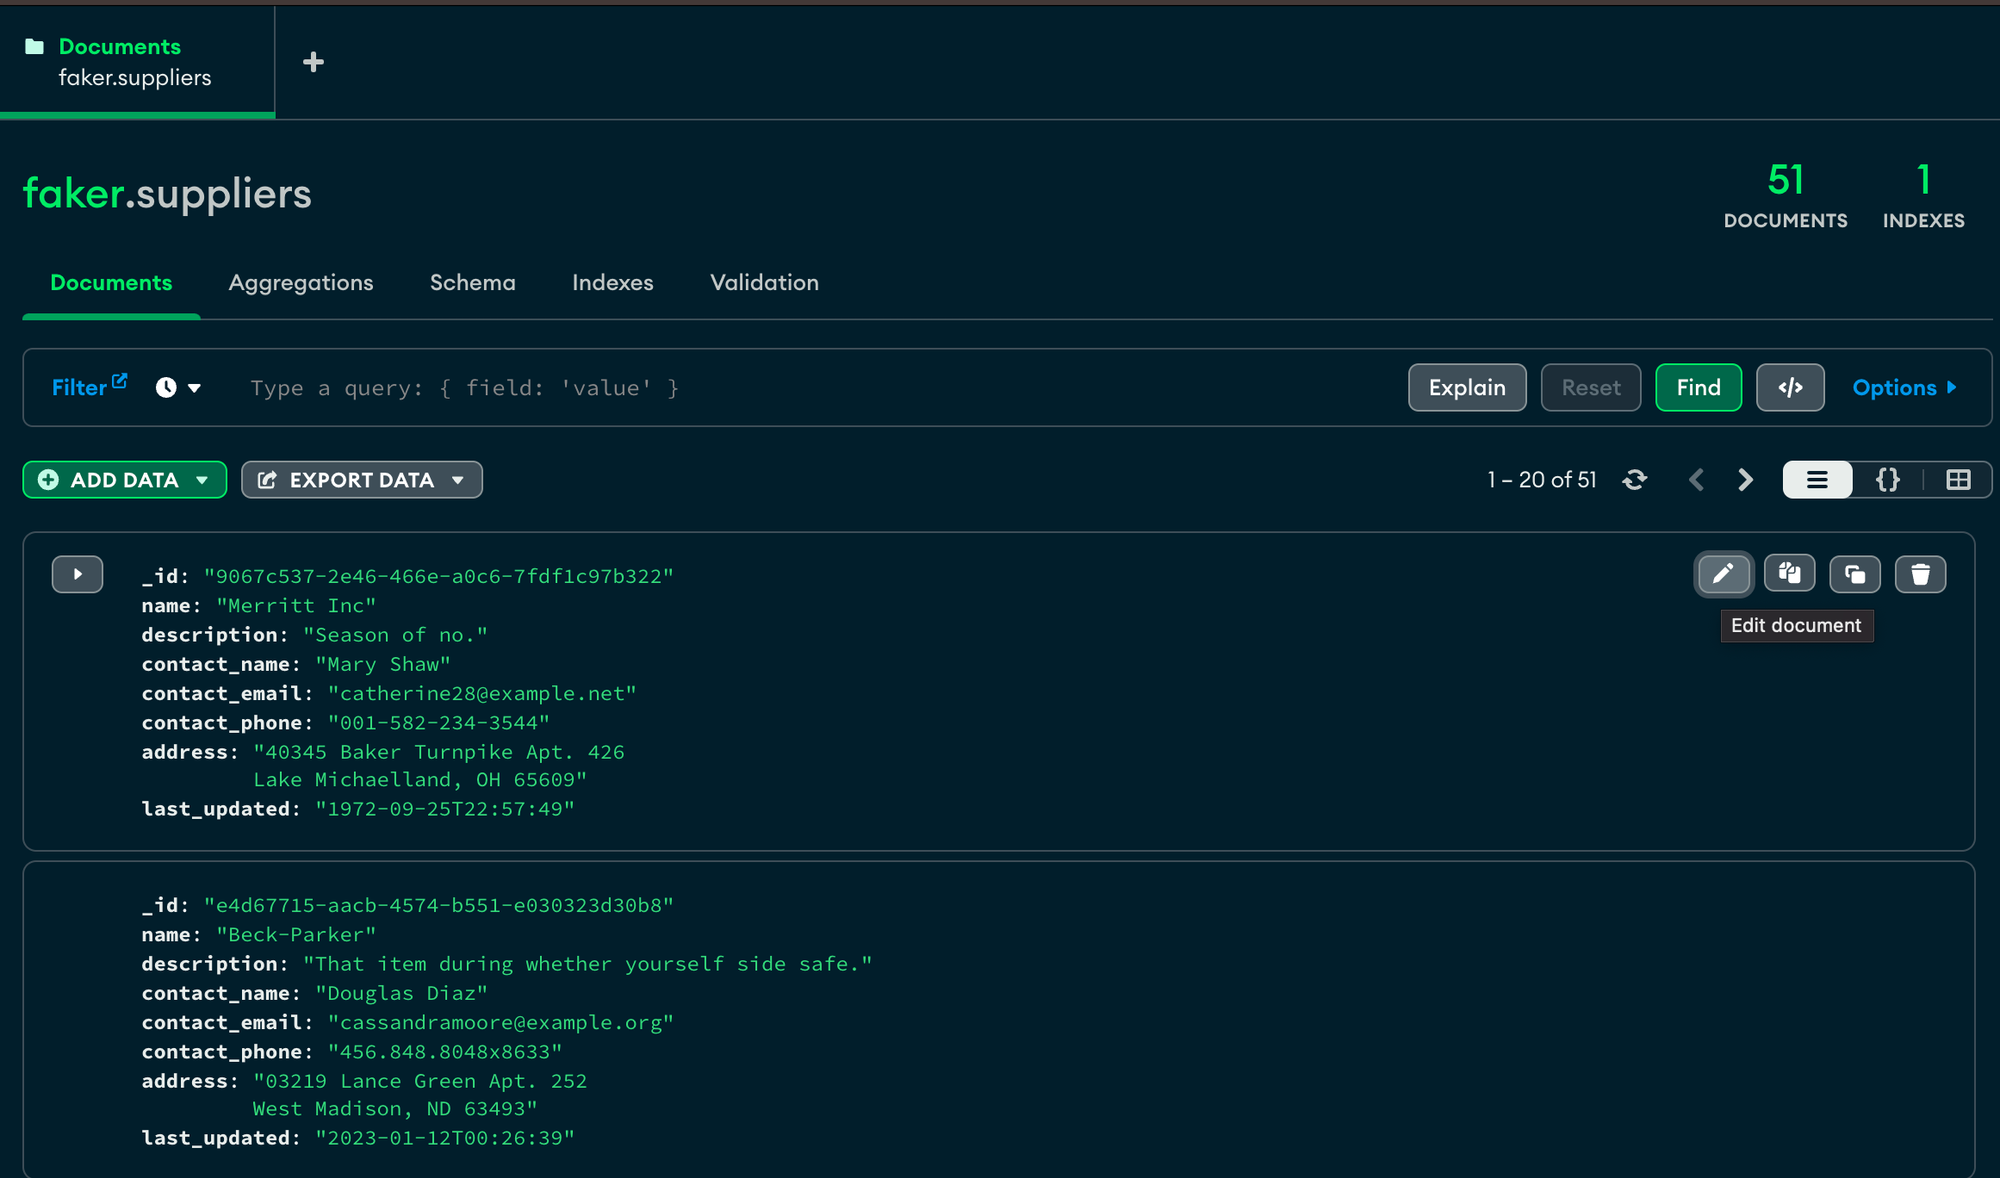
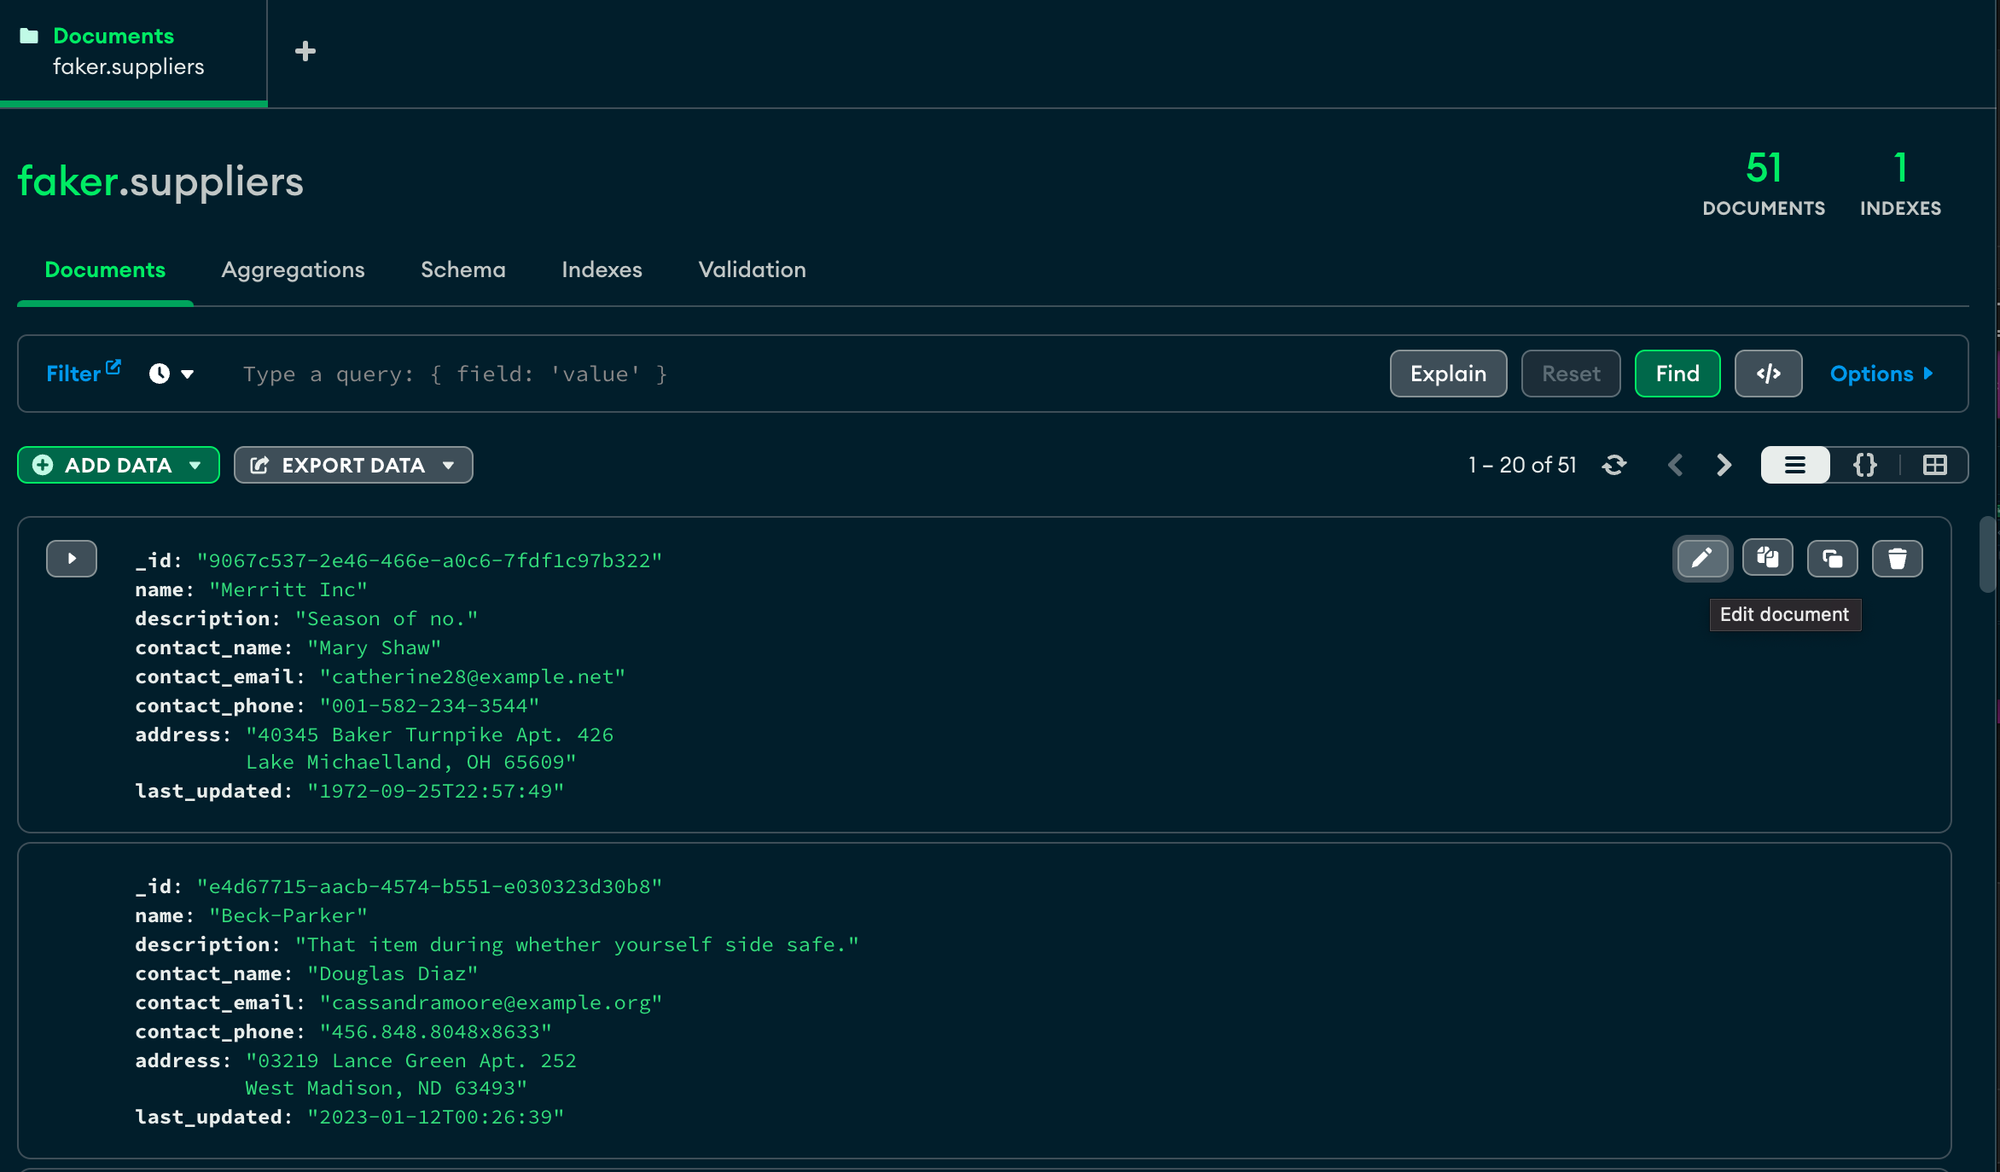
This is the document view we will be referring to in the below sections -
- Key things to note -
- There are options on this screen to edit the documents, create new documents, clone, copy and delete these documents.
- All operations described in this blog can be performed with mongosh and the compass tool as well.
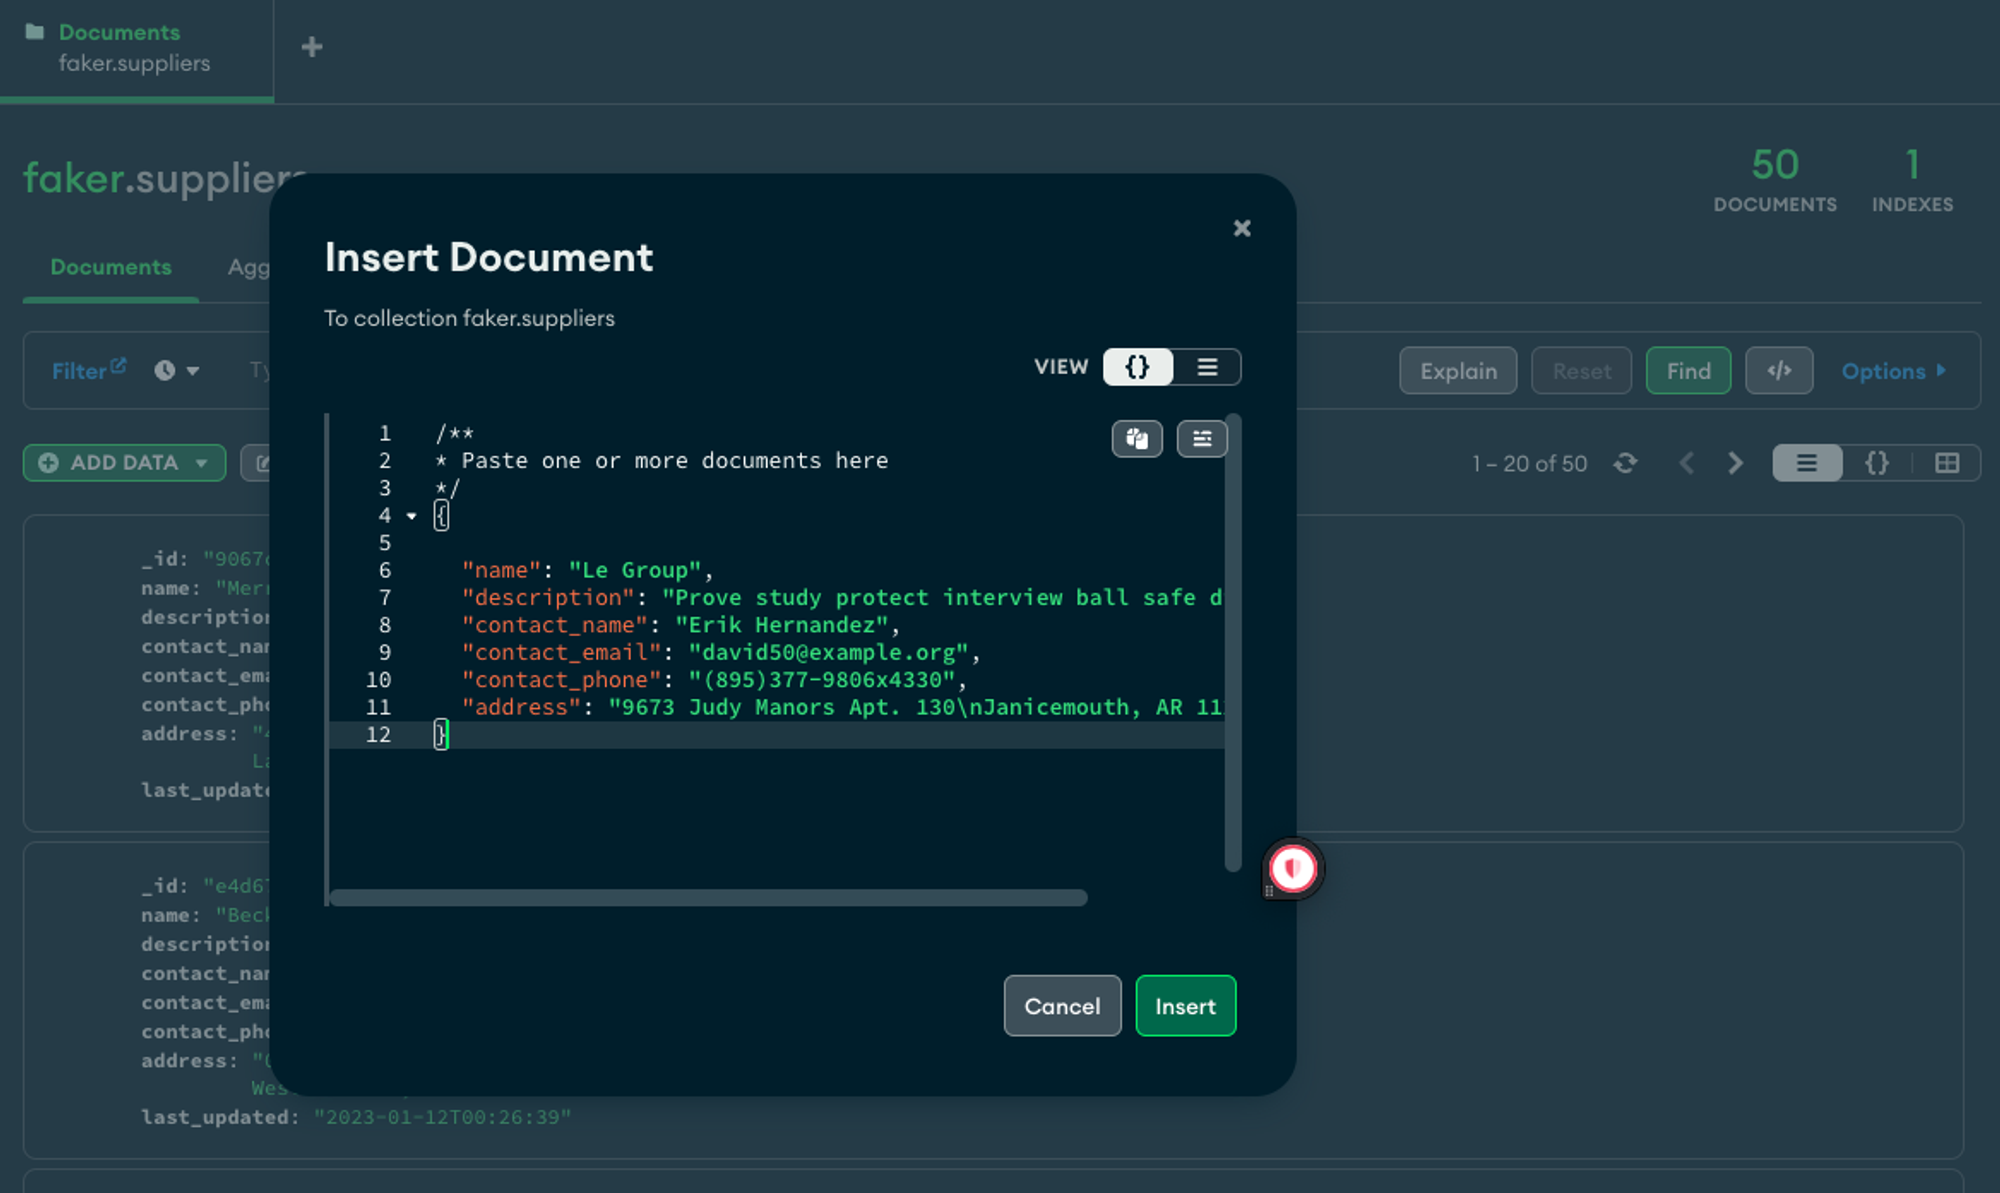
📝 Insert a single document into the collection/database
We are going to insert the below document into our suppliers collection
{
  "_id": "f5c949ac-a31c-4e53-95fc-a3310edf96da",
  "name": "Le Group",
  "description": "Prove study protect interview ball safe difference.",
  "contact_name": "Erik Hernandez",
  "contact_email": "[email protected]",
  "contact_phone": "(895)377-9806x4330",
  "address": "9673 Judy Manors Apt. 130\nJanicemouth, AR 11214"
}
- To insert a new document into the collection, you can use the Insert Document button on the top left corner of the collection view below the filter button. This will open a dialog box where you can enter the document in JSON format. For example:

- We can also use the
insertOne()method. This method takes a document as an argument and returns a result object that contains information about the insertion, such as the_idof the inserted document. For example:
The result object will look something like this:
{
  "acknowledged" : true,
  "insertedId" : "f5c949ac-a31c-4e53-95fc-a3310edf96da"
}
📚 Insert multiple documents into the collection/database
- To insert multiple documents using MongoDB’s compass would be similar to inserting a single document because we could just paste more documents into the JSON prompt as shown in the previous section.
- We could also perform a data import into the collection to insert multiple documents into MongoDB and this was already explored in the previous sections.
- We can also use the
insertMany()method. This method takes an array of documents as an argument and returns a result object that contains information about the insertion, such as the_ids of the inserted documents. For example:
The result object will look something like this:
🔄 Update a document in the database
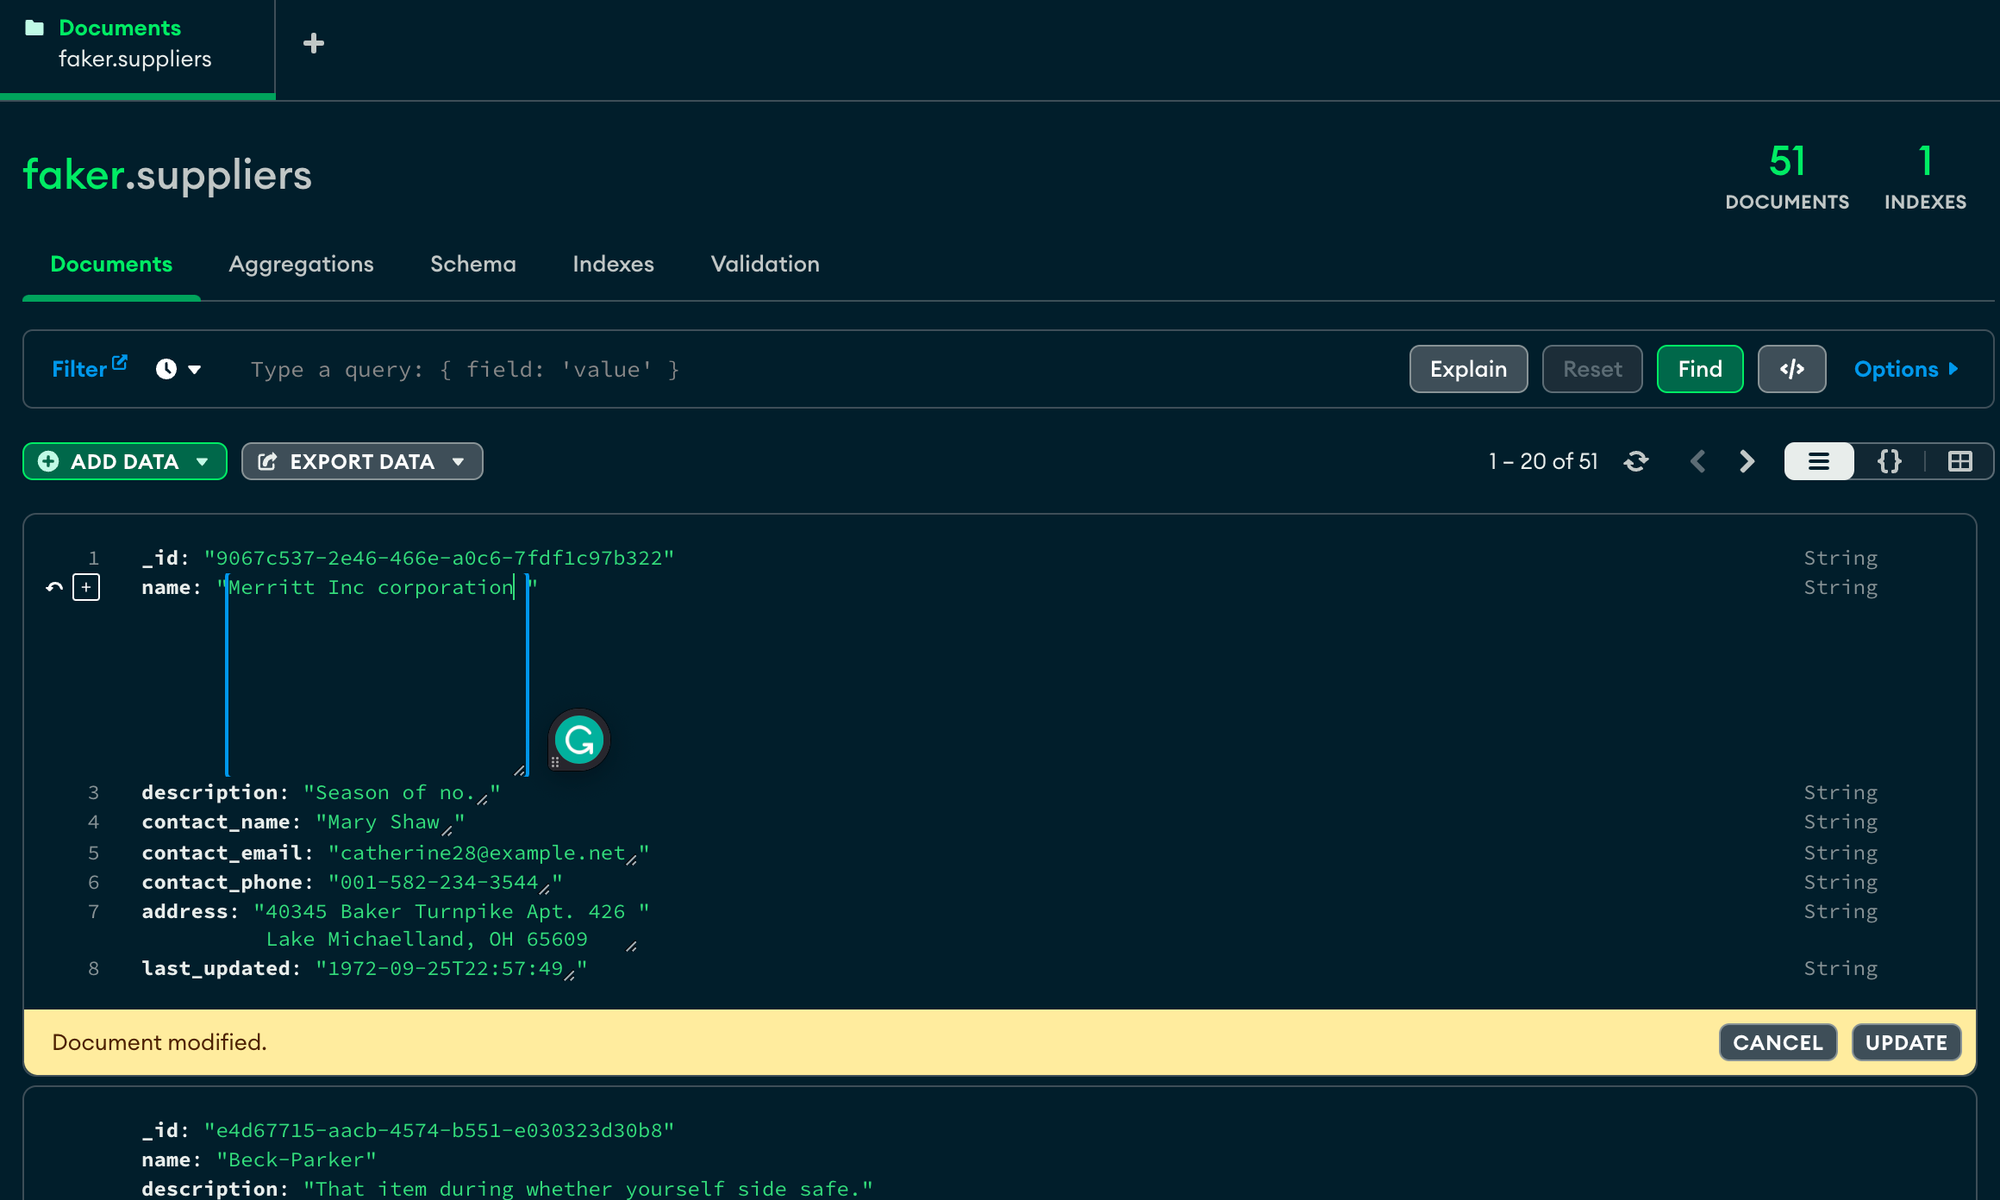
- To update a document in the collection, you can double-click on any field of the document in the collection view and edit its value. You can also use the Edit Document button on the top right corner of the document to edit the document in JSON format. For example:
- We could then click on the edit button and modify the fields as we diesre to and save them by clicking on the update buttonon the right corener as shown in the image below -
- To update a document in the collection, we can use the
updateOne()orupdateMany()methods. These methods take a filter object and an update object as arguments and return a result object that contains information about the update, such as the number of matched and modified documents. The update object can use update operators such as$set,$inc,$push, and$pullto modify the fields of the matching documents. For example:
- The result object will look something like this:
❌ Delete a document from the database
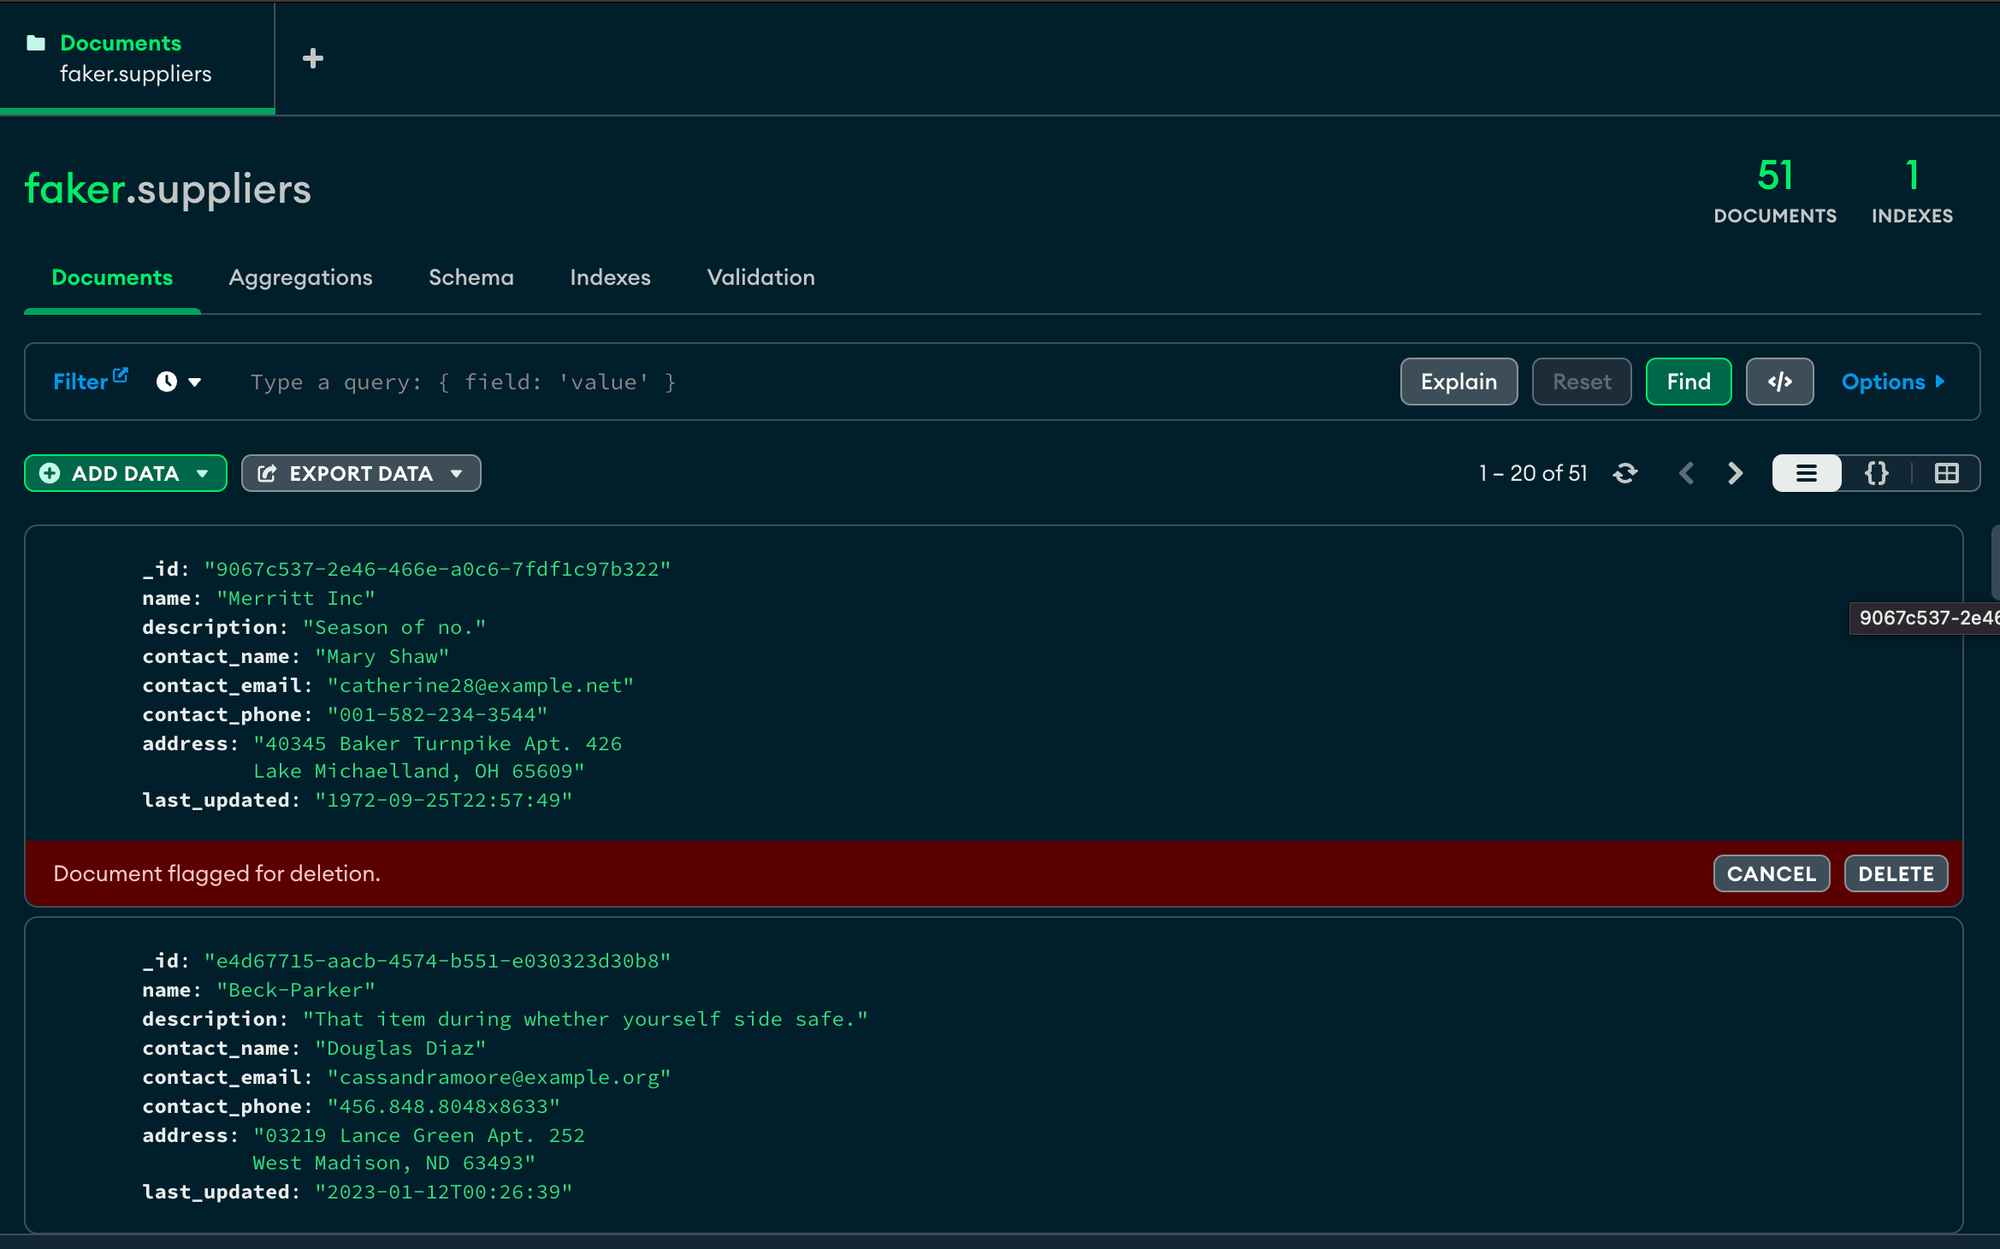
- To delete a document from the collection, you can use the Delete Document button on the top right corner of the document view. This will open a dialog box where you can confirm your action. For example:
- We can also use the
deleteOne()ordeleteMany()methods. These methods take a filter object as an argument and return a result object that contains information about the deletion, such as the number of deleted documents. For example:
- The result object will look something like this:
We will try to understand the read Operations in the next article.
About Authors
Sai Manasa Ivaturi


I'm a Software Development Engineer based in Atlanta, Georgia with 5+ years of experience in the software industry. My focus area has been Backend development and full-stack development.
View my Resume here.

Masters Degree in Computer Science Indiana University, Bloomington
Jan 22 - May 23

Bachelors Degree in Computer Science Pragati Engineering College, India
Aug 14 - April 18